


Ohm’s Law tells you exactly how voltage, current, and coil resistance combine to determine the watts your coil sees — and whether your battery can deliver that safely. The one check to run before firing any coil: divide 4.2V (a fully charged single cell) by your coil’s resistance in ohms to get the amp draw, then compare that number to your battery’s Continuous Discharge Rating (CDR). If the amps exceed the CDR, stop. The Steam‑Engine Ohm’s Law calculator runs this math in seconds, and it’s the fastest way to confirm a build is safe before you ever press the fire button.
- Core formula: I = V ÷ R (amps = volts ÷ ohms)
- Why 4.2V? That’s the peak voltage of a fully charged lithium-ion cell — the worst-case scenario for amp draw.
- The safety gate: calculated amps must stay below your battery’s CDR, with at least 1A of headroom.
Pro Tip: Never assume your battery’s CDR from memory. Pull the manufacturer’s datasheet for your exact cell model — ratings vary widely, and a cell marketed as “30A” may only carry a CDR of 20A under honest testing.
Key Takeaways
Ohm’s Law in vaping comes down to one safety check: divide 4.2V by your coil’s resistance to get amp draw, then confirm that number stays below your battery’s CDR with at least 1A of headroom.
| Point | Details |
|---|---|
| Core safety check | Calculate I = 4.2V ÷ coil ohms; keep amps below battery CDR minus 1A. |
| Start low on wattage | Begin at the bottom of the coil’s recommended wattage range and increase gradually. |
| Use Steam‑Engine | The free Steam‑Engine calculator handles all four formulas instantly — no memorization needed. |
| Battery condition matters | CDR ratings apply to new cells; aging batteries deliver less current safely, so inspect and replace regularly. |
| VapeCiga regulated mods | Devices like the GeekVape T200 and Vaporesso Swag II include built-in safety protections for everyday safe vaping. |
Table of Contents
- Quick TL;DR safety rules for every vaper
- How Ohm’s Law actually works in a vape
- The formulas you need and three worked examples
- How coil resistance maps to your vaping style
- Battery fundamentals: CDR, cell types, and what the specs mean
- Step-by-step safety calculation and Steam‑Engine walkthrough
- How wire material and coil geometry affect resistance and heat
- Regulated mods vs. mechanical mods: what changes for safety
- Common mistakes and the pre-vape checklist
- How battery age and condition change safe vaping parameters
- How series and parallel coil configurations affect resistance and battery load
- How to test coil resistance accurately with a multimeter
- Why safety-first Ohm’s Law knowledge is worth your time
- Safe, regulated devices and coils at VapeCiga
- Sources
Quick TL;DR safety rules for every vaper
These four rules cover the majority of vaping incidents before they happen.
- Assume 4.2V always. For single-cell builds, use 4.2V for every safety calculation. On dual-series setups, use 8.4V as your worst-case voltage.
- Stay under CDR with headroom. Calculate your amp draw, then subtract at least 1A from your battery’s CDR as a buffer. If the math is close, go higher resistance.
- Start at the low end of the wattage range. Every coil or coil pack lists a recommended wattage range. Start at the bottom and work up slowly, paying attention to flavor and heat.
- Regulated mods first; mech mods require manual checks. A regulated chip adjusts voltage automatically to hit your wattage target. A mechanical mod delivers raw battery voltage with zero protection — every Ohm’s Law check is on you.
Pro Tip: On a regulated mod, wattage mode is the safest control method for most vapers. It keeps the chip in charge of voltage, so you’re not guessing at amp draw as the battery drains.
How Ohm’s Law actually works in a vape
Ohm’s Law describes the relationship between three electrical quantities: voltage (V), current (I), and resistance ®. In a vaping context, each one has a direct physical meaning.
- Voltage (V): The electrical pressure pushing current through the coil. Think of it as water pressure in a pipe. A fresh lithium-ion cell sits at 4.2V; it drops toward 3.2V as it drains.
- Current (I, measured in amps): The flow of electricity through the coil. High current means the battery is working hard. Exceed the CDR and the cell overheats.
- Resistance (R, measured in ohms): The coil’s opposition to current flow. A thicker wire with fewer wraps = lower resistance = more current at the same voltage.
The triangle of rearrangements vapers use:
- I = V ÷ R (how many amps will flow)
- V = I × R (what voltage produces a given current through a given resistance)
- R = V ÷ I (minimum safe resistance for a given voltage and current limit)
Power (watts) is where heat enters the picture. Because electrical power dissipated in a resistor produces heat — the physics known as Joule heating — the wattage your coil sees maps directly to how hot it gets. The two power formulas vapers need:
- P = V × I
- P = V² ÷ R
Higher watts means a hotter coil, more vapor, and faster juice consumption. Lower watts means a cooler, tighter draw.
The formulas you need and three worked examples
The four formulas worth memorizing, per Ohm’s Law for Vaping:
- I = V ÷ R — current in amps
- P = V × I — power in watts
- P = V² ÷ R — power from voltage and resistance alone
- R = V ÷ I — minimum safe resistance
Vaping360’s worked examples use 4.2V as the conservative worst-case voltage for every calculation. Follow the same convention.
Example 1: 0.5Ω coil on a single 18650
- I = 4.2 ÷ 0.5 = a calculated current value
- P = 4.2 × calculated current = a power value
- A 20A CDR battery handles this with 11.6A of headroom. Safe.
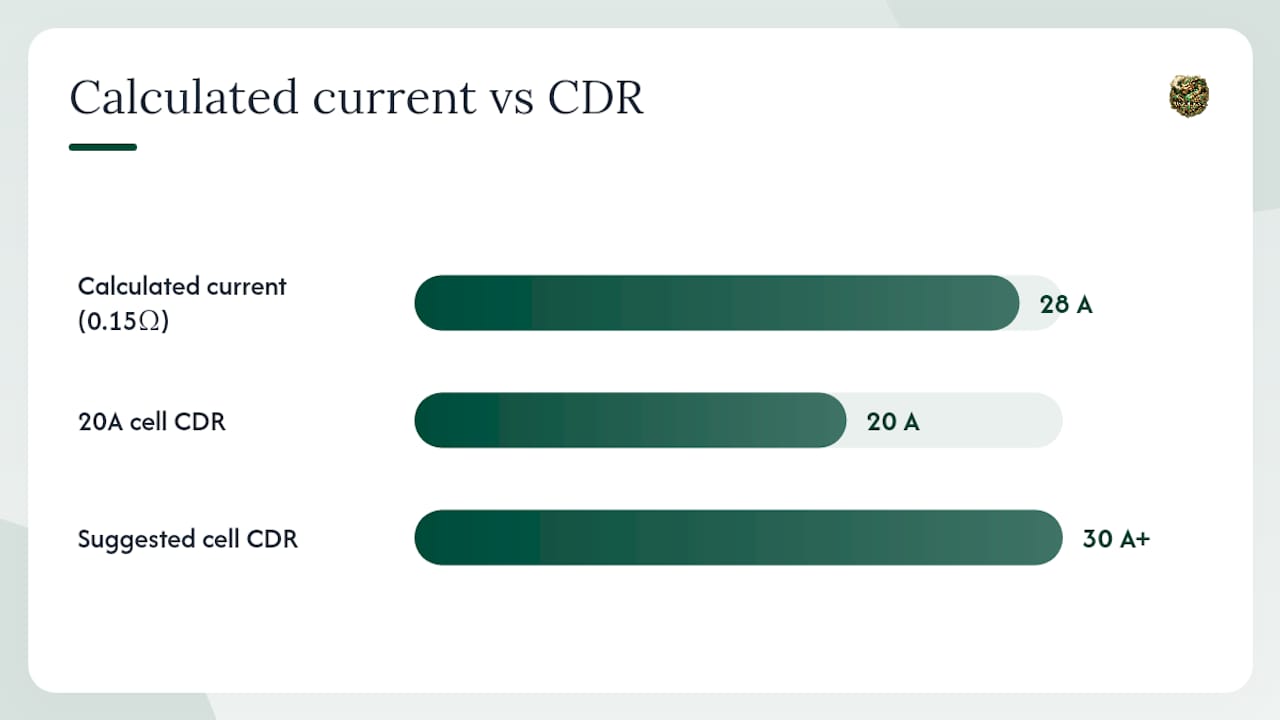
Example 2: 0.15Ω sub-ohm build on a single cell
- I = 4.2 ÷ 0.15 = a calculated current value
- P = 4.2 × calculated current = a power value
- A 20A CDR battery is already over its limit at 28A. This build requires a cell rated at least 30A CDR, and even then the headroom is slim. Use a dual-cell mod instead.
Example 3: Finding minimum safe resistance for a 10A CDR battery
- R = V ÷ I = 4.2 ÷ current limit = a minimum safe resistance value
- Any coil below 0.42Ω will pull more than 10A from this cell. With 1A headroom, target 0.47Ω or higher.
Pro Tip: Add 1A of headroom as a rule of thumb — calculate as if your CDR is 1A lower than rated. Batteries age, and their effective CDR drops over time.
How coil resistance maps to your vaping style
Resistance isn’t just a number — it shapes the entire character of a vape. The Vapers Guide maps resistance bands to vaping styles and typical wattage ranges:
| Resistance | Style | Typical Wattage | Juice VG/PG |
|---|---|---|---|
| Above 1Ω | MTL (mouth-to-lung) | 8W | 50/50 PG |
| 0.6Ω | RDL (restricted direct lung) | 15–30W | 60% VG |
| 0.3–0.5Ω | DTL (direct lung) | 30W | 70% VG |
| Below 0.3Ω | Sub-ohm / cloud | 60W | Max VG (80%) |
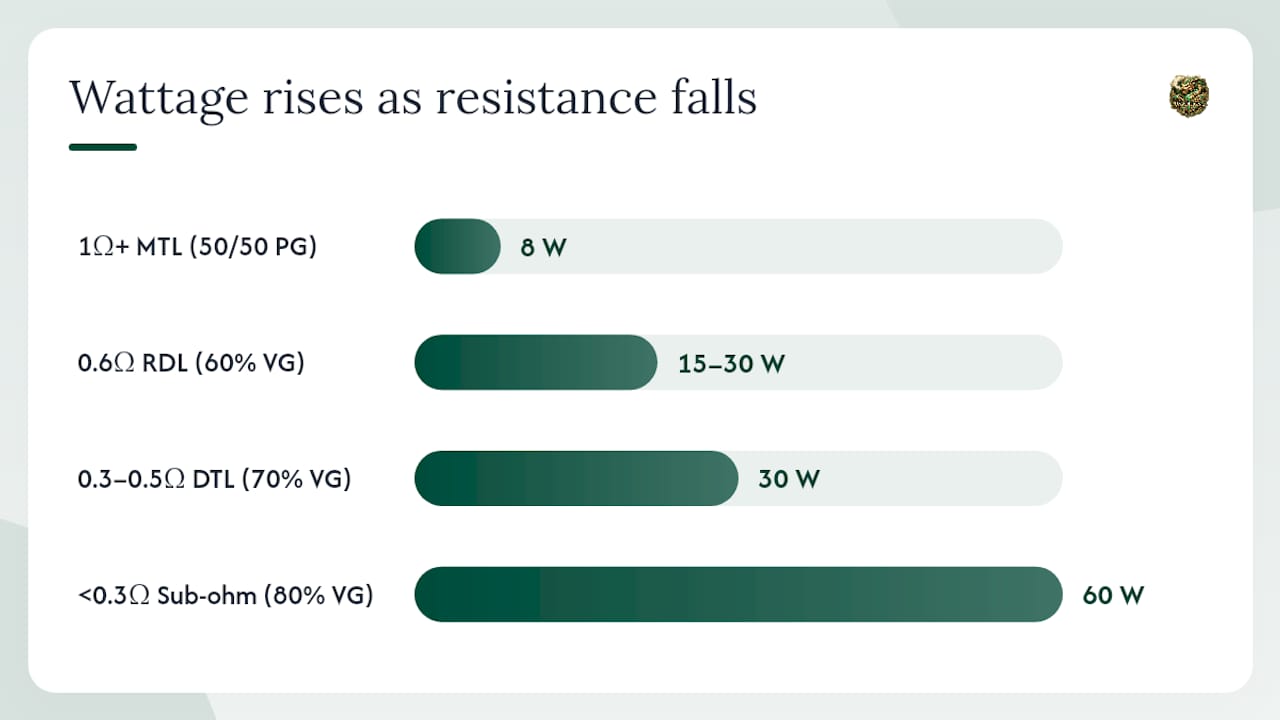
Higher-resistance coils run cooler, draw less current, and pair well with higher-PG, higher-nicotine juices. Lower-resistance coils run hotter, pull more amps, and need high-VG juice to handle the heat without burning. For a deep look at MTL tank options and how higher-resistance coils support that style, VapeCiga’s MTL guide covers the specifics.
Juice viscosity matters here too. Thin, high-PG juice wicks fast — fine for tight coils at low wattage. Thick, high-VG juice needs a coil with larger wicking ports and enough heat to vaporize it properly. Pairing a max-VG juice with a 1.2Ω MTL coil at 10W typically produces weak, unsatisfying vapor. The VG/PG ratio guide at PouchSupply explains the formulation side in detail.
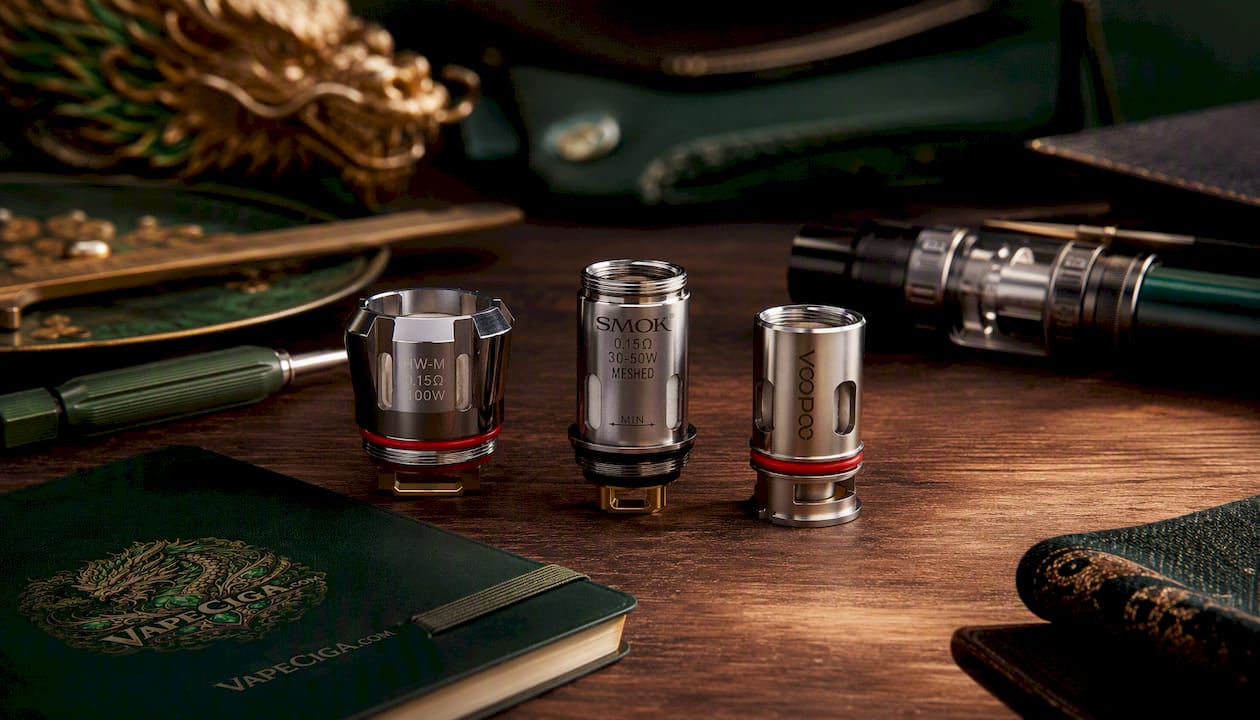
For coil options that match these resistance bands, GeekVape mesh coils for the Zeus sub-ohm tank show the recommended wattage ranges printed right on the packaging — a good model for what to look for when buying any replacement coil.
Battery fundamentals: CDR, cell types, and what the specs mean
The Continuous Discharge Rating is the maximum current a battery can sustain continuously without overheating or degrading rapidly. Exceeding it isn’t just bad for the cell — it’s a thermal runaway risk. CDR must come from the battery manufacturer’s datasheet for your exact cell model, not from the wrapper or a retailer’s listing.
Common 18650 cells used in vaping carry CDRs depending on chemistry and capacity, with lower-capacity cells generally having higher limits. Higher-capacity cells tend to have lower CDRs; high-drain cells typically carry higher limits. You trade capacity for current headroom.
Series vs. parallel battery configurations:
- Series (dual-cell, stacked): Voltage doubles (4.2V × 2 = 8.4V worst case), but capacity stays the same. Higher voltage means more power at the same resistance, so amp draw per cell stays similar — but your worst-case voltage for calculations is now 8.4V.
- Parallel: Voltage stays the same (4.2V), but capacity and current capability effectively double. Two 20A cells in parallel can theoretically supply 40A, though real-world headroom still applies.
For a practical guide to battery current calculations and worst-case checks, Planet of the Vapes covers the electrical basics clearly.
Pro Tip: Always use a regulated dual-cell mod for sub-ohm builds below 0.3Ω. The math on a single cell at those resistances almost always exceeds safe CDR limits.
Step-by-step safety calculation and Steam‑Engine walkthrough
Follow this procedure before firing any new coil or build:
- Measure coil resistance. Use your mod’s resistance reader or a dedicated coil jig/multimeter. Never trust the printed value alone.
- Set voltage to 4.2V (or 8.4V for dual-series). This is your worst-case scenario.
- Calculate amp draw: I = 4.2 ÷ R.
- Compare to CDR. If calculated amps exceed CDR, the build is unsafe. Stop.
- Apply 1A headroom. Treat your effective CDR as 1A lower than rated.
- Check against coil’s recommended wattage range. Your calculated wattage (P = V² ÷ R) should fall within the coil manufacturer’s range.
- Start at the low end of that wattage range and increase gradually.
Worked safety example A: 10A CDR battery
- Minimum safe R = 4.2 ÷ (10 – 1) = 4.2 ÷ 9 = 0.47Ω
- Any coil below 0.47Ω is unsafe on this cell.
Worked safety example B: 0.15Ω build on a 20A CDR cell
- I = 4.2 ÷ 0.15 = 28A. That’s 8A over a 20A CDR. Unsafe on a single cell.
- On a dual-series setup (8.4V), the amp draw per cell is still 28A — still unsafe on a 20A cell. This build needs cells with a genuine 30A+ CDR or a regulated mod that limits current output.
Using Steam‑Engine:
The Steam‑Engine Ohm’s Law calculator lets you enter any two known values and it calculates the rest. Enter your resistance and voltage, lock those fields, and read off the current and wattage. You can also work backward: enter your CDR as the current limit and your voltage, and it tells you the minimum resistance. The interface is straightforward — no account needed, no app to install.
Simple decision rule: If calculated amps are below CDR minus 1A, and calculated watts fall within the coil’s recommended range, you’re good to fire.
How wire material and coil geometry affect resistance and heat
The wire you wind a coil from changes how it behaves at a given wattage, not just what resistance it measures.
- Kanthal A1: The standard for most pre-made coils. Stable resistance across temperatures, easy to work with, compatible with wattage and voltage modes.
- Nichrome (Ni80): Lower resistance per length than Kanthal, faster ramp-up, slightly softer flavor profile. Popular for flavor builds.
- Stainless steel (SS316L): Works in both wattage mode and temperature control (TC) mode. Slightly lower resistance than Kanthal; clean flavor.
- Titanium (Ti): TC mode only. Very low resistance, fast ramp-up, requires accurate TC to avoid overheating.
- Ni200 (pure nickel): TC mode only. Near-zero resistance at room temperature; never use in wattage mode.
Wire gauge matters too. Thicker wire (lower AWG number, like 22 AWG) has lower resistance per unit length and more thermal mass, meaning it ramps up more slowly but holds heat longer. Thinner wire (28–30 AWG) ramps fast and responds quickly to power changes. Coil mass, not just resistance, determines how a build feels at a given wattage — two coils measuring the same ohms can behave very differently if one uses thick wire with few wraps and the other uses thin wire with many.
Pro Tip: When breaking in a new build, start 10–15W below the coil’s recommended range and take a few short puffs. Watch for even glow from the center outward, not hot spots at the legs. Adjust wattage only after the coil is wicking and glowing evenly.
Regulated mods vs. mechanical mods: what changes for safety
On a regulated mod, the chip reads your wattage target and adjusts the output voltage to deliver exactly that power regardless of battery charge level. The GeekVape T200 (Aegis Touch) Mod and the Vaporesso Swag II VW Box Mod 80W are good examples of regulated devices that include low-resistance protection, short-circuit protection, and over-temperature cutoffs. These safety features don’t replace Ohm’s Law knowledge, but they do catch most errors before they become dangerous.
On a mechanical mod, none of that exists. The battery connects directly to the coil, and the voltage delivered is whatever the cell holds at that moment. That means:
- Every build requires a manual Ohm’s Law check.
- Battery selection is critical — CDR must exceed your calculated amp draw with headroom.
- Battery wrap condition must be inspected before every use. A nicked wrap on a mech mod is a short-circuit risk.
- Resistance must be measured, not assumed.
Mech mod safety checklist:
- Measure coil resistance with a multimeter or coil jig before installing.
- Calculate I = 4.2 ÷ R and confirm it’s below CDR minus 1A.
- Inspect battery wrap for tears, dents, or corrosion.
- Verify the mod’s threading and contact points are clean and making solid contact.
- Never fire a mech mod with a resistance reading that seems inconsistent or unusually low.
Common mistakes and the pre-vape checklist
Most vaping safety incidents trace back to a short list of avoidable errors.
Common mistakes:
- Ignoring CDR and choosing batteries by capacity alone.
- Using high-VG juice in a tight MTL coil — poor wicking leads to dry hits and burnt coils.
- Not measuring resistance before firing a new build.
- Firing a coil with a damaged or re-wrapped battery.
- Assuming a regulated mod’s wattage limit equals a safe build on any coil.
- Wiring shorts from loose coil legs touching the deck or RDA posts.
Pre-vape checklist:
- Measure coil resistance. Compare to the expected value.
- Run I = 4.2 ÷ R and confirm amps are below CDR minus 1A.
- Confirm calculated watts fall within the coil’s recommended wattage range.
- Inspect battery wrap and contacts.
- Start at the low end of the wattage range.
Red alerts — stop and fix before firing:
- Calculated amps exceed battery CDR.
- Resistance reading is inconsistent, near zero, or wildly different from expected.
- Visible damage to battery wrap, dents, or leaking.
- Mod displays a short-circuit or low-resistance error code.
- Coil glows unevenly or shows hot spots at the legs.
How battery age and condition change safe vaping parameters
A battery’s CDR is a new-cell rating. As a lithium-ion cell cycles through charges and discharges, its internal resistance increases and its effective current delivery drops. A cell that tested at 25A CDR when new may only safely deliver 18–20A after a year of regular use — and it won’t announce that change on its wrapper.
Practical signs a battery is past its safe working life:
- Noticeably shorter battery life between charges.
- The mod reports lower voltage than expected at rest.
- The cell feels warm after a moderate vaping session, not just after heavy use.
- Any swelling, bulging, or deformation of the cell body.
Battery type also matters. IMR (lithium manganese) cells are the standard for high-drain vaping use because they fail more safely than older ICR chemistry. Hybrid cells (INR) balance capacity and drain well and dominate the current 18650 market. Avoid any cell without a verifiable CDR from the manufacturer’s datasheet, regardless of what the wrapper claims.
Charging habits affect longevity too. Storing cells fully charged for extended periods accelerates degradation. Use a dedicated charger with per-cell monitoring rather than charging through a mod’s USB port when possible.
How series and parallel coil configurations affect resistance and battery load
This applies to RDA and RTA builders running dual-coil setups, not just battery configurations.
Dual coils in parallel (both coils connected between the same positive and negative posts):
- Total resistance = half the resistance of a single coil. Two 0.4Ω coils in parallel = 0.2Ω total.
- The battery sees the combined load of both coils. Amp draw doubles compared to a single coil at the same voltage.
- Wattage doubles too, split evenly between the two coils.
Dual coils in series (coils chained so current flows through one then the other):
- Total resistance = sum of both coils. Two 0.4Ω coils in series = 0.8Ω total.
- Amp draw is lower than a single coil at the same voltage, but each coil receives half the voltage.
- Less common in vaping builds; mostly seen in specific RDA configurations.
The practical takeaway: parallel dual-coil builds are the norm in sub-ohm RDAs, and they cut your effective resistance in half. Always measure the final assembled resistance rather than calculating from individual coil specs — small variations in wraps and wire add up.
How to test coil resistance accurately with a multimeter
Testing resistance before installation catches wiring errors, shorts, and bad coil stock before they reach your battery.
What you need: A digital multimeter set to the ohms (Ω) resistance function, or a dedicated coil jig/ohm reader.
Step-by-step:
- Set the multimeter to the lowest ohms range (typically 200Ω).
- Touch the probes together and note the lead resistance — usually 0.1–0.3Ω. You’ll subtract this from your coil reading.
- Connect the coil leads to the probes. For a coil on a deck, connect one probe to the positive post and one to the negative post (or ground).
- Read the display. Subtract the lead resistance from step 2. The result is your coil’s actual resistance.
- Compare to expected value. If the reading is near zero, you have a short. If it’s wildly higher than expected, a coil leg may not be making solid contact.
- Repeat after installing in the mod. Resistance can shift slightly when the coil is clamped into the deck. Confirm the reading matches before firing.
A coil jig (a small dedicated ohm reader) is faster and purpose-built for this task. Most regulated mods also read resistance on the screen when you install a new coil — use that as a secondary confirmation, not a replacement for a pre-installation check.
Why safety-first Ohm’s Law knowledge is worth your time
Most vapers who skip the math do fine for years — until they don’t. The cases where things go wrong almost always share a common thread: someone assumed a battery was fine, trusted a wrapper rating without checking a datasheet, or fired a build without measuring resistance first. The physics doesn’t care about assumptions.
What makes Ohm’s Law worth understanding isn’t the formulas themselves. It’s the habit of thinking about your build as an electrical circuit with real limits, not just a device you press a button on. That shift in perspective is what separates a vaper who catches a problem before it happens from one who finds out the hard way.
Regulated mods handle a lot of the math automatically, and for most vapers that’s the right call. But knowing why the chip is doing what it’s doing — and knowing how to check the numbers yourself when you’re building a coil or choosing a battery — makes every session safer and every build more intentional.
Safe, regulated devices and coils at VapeCiga
Understanding the math is one thing. Having the right gear to put it into practice is another.
VapeCiga stocks a range of regulated mods, replacement coils, and pod systems for adults 21+ across the USA, with fast domestic shipping. For vapers who want wattage control and built-in safety protections, the GeekVape T200 (Aegis Touch) Mod and Vaporesso Swag II VW Box Mod 80W both include short-circuit protection, low-resistance cutoffs, and wattage mode as standard. The compact Vaporesso GTX One 40W suits moderate wattage use and is a solid starting point for vapers moving from disposables to a regulated setup. If you prefer a plug-and-play option with no coil building required, the Packspod 5000 removes the math entirely. Always verify your battery’s CDR before purchasing, follow manufacturer wattage recommendations, and comply with your local laws. Must be 21+ to purchase.