


If your auto draw isn’t firing, pull the pod out, dry the contacts with a cotton swab, and check your battery charge. That combination resolves the majority of draw-activation failures. Here’s what to do right now:
- Remove the pod and inspect the bottom contacts for e-liquid residue or debris.
- Wipe the pod contacts and the device chamber with a dry cotton swab or an alcohol-free wipe.
- Test with a known-good pod if you have one. If the device fires with a fresh pod, the original pod or coil is your culprit.
If liquid is visibly pooled inside the chamber, let the device air-dry for 15–20 minutes before reinserting anything. The one scenario that’s usually not fixable at home: e-liquid has soaked the internal airflow sensor over time, which tends to cause permanent failure.
Stop using the device immediately if the battery feels hot, you smell something burning, or the device fires on its own without any draw. Set it on a non-flammable surface and do not attempt to charge it.
Pro Tip: Before anything else, check whether your device has a button-activation option. If it fires on button but not on draw, the sensor is the problem, not the battery or chip.
Key Takeaways
Testing with a known-good pod and checking battery charge first resolves most auto-draw failures before any deeper repair is needed.
| Point | Details |
|---|---|
| Start with battery and pod | Low charge and a bad pod account for most auto-draw failures; check these before anything else. |
| Clean contacts immediately | Wipe pod and device contacts with a dry swab; e-liquid residue is the top cause of sensor issues. |
| Use the blow-reset carefully | Blowing into the mouthpiece clears condensation, but liquid coming out signals internal flooding. |
| Stop use for battery hazards | Swelling, burning smell, or uncontrolled auto-firing means stop immediately and do not recharge. |
| VapeCiga for replacements | VapeCiga carries compatible replacement pods, coils, and devices with fast U.S. shipping. |
Table of Contents
- Why is your auto draw not working? A step-by-step diagnostic
- Model-specific fixes for Caliburn, Caliburn X, XROS, and XROS Pro
- When should you replace the pod, coil, or device?
- Routine maintenance to keep auto-draw working reliably
- When to stop using the device entirely
- The diagnostic logic most vapers skip
- Replacement pods, coils, and accessories at VapeCiga
- Sources
Why is your auto draw not working? A step-by-step diagnostic
Start safe. Power the device off if it has a button, remove the pod, and don’t vape again until you’ve run through these checks.
The ordered checklist
- Check battery charge. A low battery is the single most common reason an auto-draw sensor won’t trigger. Charge fully and retest before anything else.
- Inspect the pod and contacts. Look for e-liquid pooling in the pod bay, corroded or bent contact pins, and debris. Wipe everything with a dry cotton swab.
- Clean with an alcohol-free wipe. Dampen a cotton swab lightly and clean the contact pins on both the pod and the device. Let it dry completely.
- Try a known-good pod or coil. This is the fastest diagnostic step. Swap in a pod you know works. If the device fires, your original pod is dead. If it still won’t fire, the fault is in the battery or chip. Testing with a known-good pod or battery cuts troubleshooting time dramatically and tells you whether the fault is replaceable or likely internal, as Vape Green’s troubleshooting guide confirms.
- Try the blow-reset method. Remove the pod, point the mouthpiece away from your face, and blow a short, gentle puff into the mouthpiece. This can clear condensation or debris that’s falsely triggering the airflow sensor. If liquid sprays out when you do this, the device has internal flooding and needs to dry out fully before any further use.
- Check the airflow holes and mouthpiece. A blocked airflow path can prevent the sensor from reading a draw at all. Clear any visible debris with a toothpick or a short blast of compressed air.
- Inspect for visible damage. Cracks, bent pins, or discoloration around the battery area are signs of a deeper fault.
Pass/fail symptom guide
| Symptom | Likely cause | First action |
|---|---|---|
| No fire, lights up normally | Blocked sensor or dirty contacts | Clean contacts, try blow-reset |
| No fire, no lights | Low charge or dead battery | Charge device fully |
| Fires with new pod, not old | Worn coil or bad pod contact | Replace pod/coil |
| Fires on button, not on draw | Auto-draw sensor fault | Inspect sensor area, dry thoroughly |
| Fires constantly without drawing | Liquid leak into sensor | Remove pod, air-dry, stop use if it continues |
Blu’s auto-firing guide confirms that moisture or e-liquid getting into the device, poor coil contact, and faulty sensors are the three most common causes, and that cleaning and inspection should always come first.
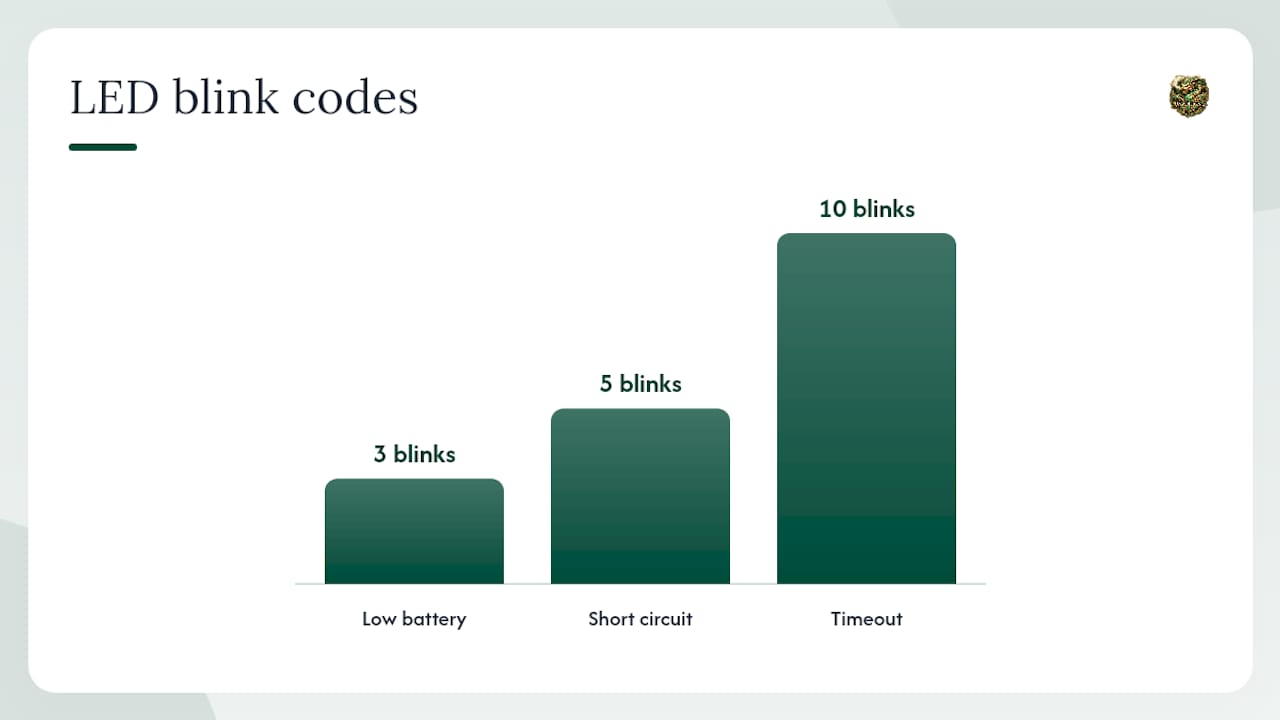
Pro Tip: If your device has a puff counter or LED indicator, count the blinks when you try to draw. Most devices signal low battery (3 blinks), short circuit (5 blinks), or timeout (10 blinks) with distinct patterns. Check your manual for the code.
Safety callout: A battery that feels warm to the touch during normal use, swells, or emits any smell is a hazard. Stop charging, remove the pod, and place the device on a ceramic or metal surface away from anything flammable. Do not continue troubleshooting.
Model-specific fixes for Caliburn, Caliburn X, XROS, and XROS Pro
Caliburn family (original, G, G2)
The Caliburn’s draw sensor sits near the base of the pod bay. E-liquid leaking from the pod’s bottom seal is the most common cause of auto draw issues on this platform. Community troubleshooting consistently shows that removing the pod, drying the contacts, and using the gentle blow-into-mouthpiece reset resolves most cases. Repeated liquid ingress, though, tends to cause permanent sensor damage over time.
- Pull the pod and check the rubber seal at the base. If it’s cracked or deformed, the pod is leaking.
- Wipe the two gold contact pins inside the bay with a dry swab.
- Blow gently into the mouthpiece (pod removed) to push out any condensation near the sensor.
- If liquid comes out when you blow, let the device sit upright and open for at least 30 minutes before retesting.
Caliburn X
Forum reports for the Caliburn X point to two specific failure patterns: low battery charge causing sensor under-voltage, and coil contact misalignment where the coil doesn’t seat flush against the pins. Reseating the pod firmly (press until you feel it click) and ensuring the coil is fully pushed into the pod head often resolves the problem.
- Check that the coil is fully seated in the pod before inserting the pod into the device.
- If the pod wobbles in the bay, the contact pins may be slightly bent. Use a toothpick to gently lift them back to their original position.
- Test the pod in a second Caliburn X if one is available. If it fires there, the battery or chip in your device is suspect.
XROS and XROS Pro
The XROS family uses both button and auto-draw activation, which is actually a useful diagnostic tool. Auto-draw sensors can be triggered by environmental conditions like wind, humidity, and pocket pressure, and dual-activation devices let you isolate whether the sensor or the chip is at fault. If the button fires but the draw doesn’t, the sensor is the problem. If neither fires, suspect the battery or a chip fault.
- Test button activation first. A working button with a dead draw sensor points directly at the airflow sensor.
- Condensation inside the mouthpiece is common on the XROS Pro. Blow through the mouthpiece (pod removed) and wipe the sensor window if accessible.
- Avoid vaping in strong wind or high humidity without a windbreak. Auto-draw sensors are more vulnerable to environmental triggers than button-activation systems.
On replacement options: If your device has reached the end of its repair life, there are solid replacements available at different price points. The 2027 Date 7 2000 and Packspod 5000 are straightforward draw-activated options. For users who want a more capable mod setup, the GeekVape T200 (Aegis Touch) Mod, Vaporesso Swag II VW Box Mod 80W, and Vaporesso GTX One Vape Mod 2000mAh 40W offer button-activation and adjustable wattage, which eliminates auto-draw sensor issues entirely. The EBCREATE BC40000 PRO is another high-capacity option worth considering.
When should you replace the pod, coil, or device?
Signs the pod or coil is the problem
- Wet or sticky contacts on the pod bottom
- Burnt or harsh taste even at low wattage (see why vapes taste burnt for more on coil lifespan)
- Darkened or gunked-up coil cotton visible through the pod window
- Intermittent firing that improves with pod pressure or repositioning
- The device fires normally with a different pod
Replace the pod or coil first. It’s the cheapest fix and it eliminates the most common cause in one step. Vaporesso XTRA replacement pods and Vaporesso Target PM30 cartridges are examples of compatible replacement options available from VapeCiga.
Signs the battery, chip, or sensor is damaged
- Auto-firing persists after installing a brand-new pod
- Visible e-liquid inside the device body, not just the pod bay
- Battery feels hot or appears swollen
- Device fires erratically or won’t respond to any input
At this point, stop troubleshooting and move to warranty or replacement. Further use risks a battery incident.
Warranty and RMA steps
- Locate your proof of purchase (order confirmation email or receipt).
- Note the device model and serial number (usually on the bottom of the device or the original packaging).
- Take clear photos of the damage, the contacts, and any visible liquid ingress.
- Contact the vendor or manufacturer directly. Most reputable brands offer a 90-day to one-year warranty on manufacturing defects. Liquid damage from user handling is typically excluded, so describe the issue accurately.
- Before contacting a vendor, checking their BBB profile for complaint history and response patterns can give you a realistic sense of how quickly they handle warranty claims.
Routine maintenance to keep auto-draw working reliably
Most auto-draw failures are preventable. A short weekly routine keeps the sensor clean and the contacts solid.
Weekly:
- Wipe the pod contacts and device bay with a dry cotton swab.
- Inspect the pod’s rubber seal for cracks or deformation.
- Check the mouthpiece and airflow holes for debris or dried e-liquid.
- If moisture is visible in the chamber, remove the pod and let the device air-dry before the next session.
Storage and handling:
- Remove the pod before storing the device for more than a day or two. Residual e-liquid frequently leaks during inactivity and soaks the internal sensor, which is one of the leading causes of permanent failure.
- Store the device upright. Horizontal storage lets e-liquid pool toward the sensor area.
- Avoid leaving the device in a hot car, a pocket with keys or coins, or in direct sunlight. Heat accelerates e-liquid thinning and leaking; pressure on the mouthpiece can trigger false draws.
- Avoid long chain-vaping sessions. Sustained heat thins e-liquid and increases the chance of a leak into the sensor area.
E-liquid tips:
- Thinner, high-PG e-liquids flow more freely and are more likely to leak into the sensor. Salt nicotine liquids formulated for pod systems tend to have a balanced VG/PG ratio that performs better in draw-activated devices.
- Overfilling a pod is a common cause of sensor flooding. Fill to the max line and no further.
Pro Tip: Always remove the pod before putting the device in a bag or leaving it unused overnight. That one habit prevents the majority of sensor-soaking failures.
When to stop using the device entirely
Some conditions mean the device is no longer safe to use. Stop immediately and do not attempt further troubleshooting if you notice any of the following:
- The battery is visibly swollen or the device casing is deformed
- You smell burning plastic, a chemical odor, or anything that doesn’t smell like e-liquid
- The device fires continuously without any draw and won’t stop
- Sparks, smoke, or excessive heat from the battery area
- Visible circuit damage or e-liquid that has reached the battery compartment
Vapesuperstore’s breakdown of auto-firing causes notes that most devices include a safety cut-off that stops firing after a set duration, but a damaged sensor or shorted chip can override that protection.
Immediate steps if the device is behaving dangerously:
- Power off using the button if accessible.
- Remove the pod.
- Place the device on a ceramic tile, metal tray, or concrete surface, away from people and flammable materials.
- Do not put it in a pocket, bag, or trash can.
Battery disposal: Lithium-ion batteries cannot go in household trash. Drop them at a local hazardous-waste collection site or a retailer that accepts battery recycling. Call2Recycle maintains a locator at call2recycle.org for U.S. drop-off points.
The diagnostic logic most vapers skip
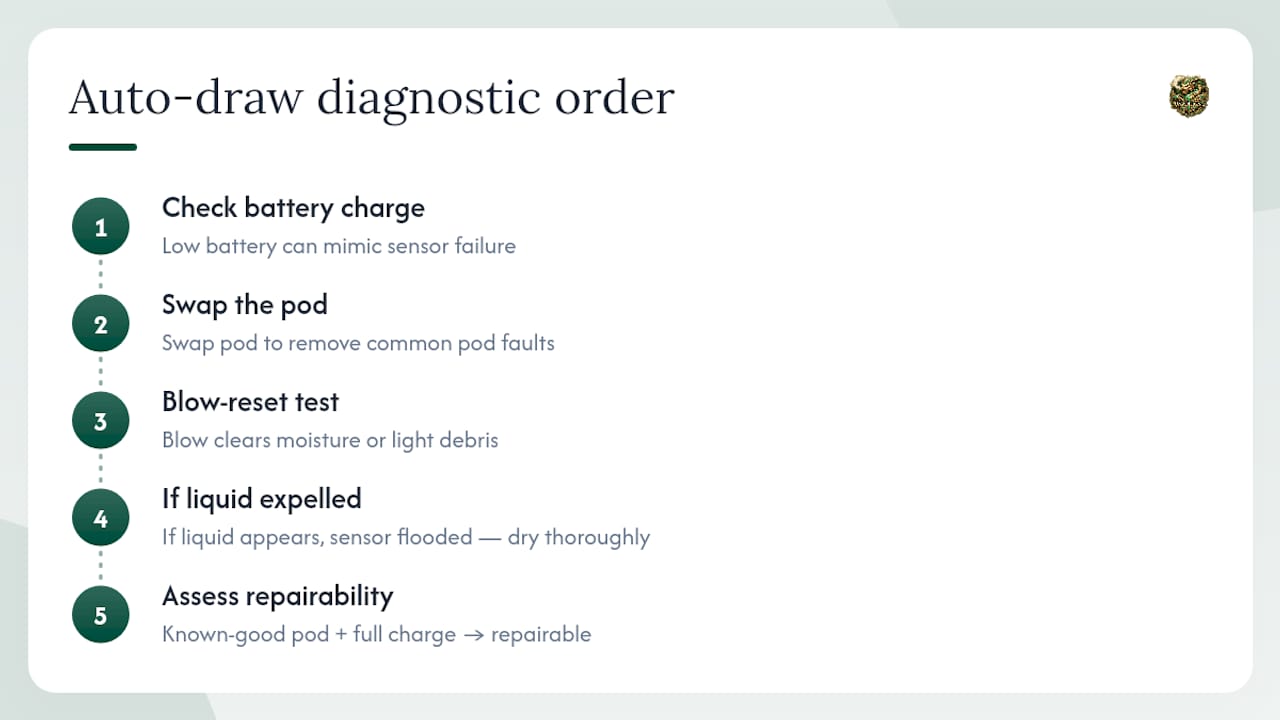
Most auto-draw troubleshooting articles list causes without explaining the order. The reason the checklist above starts with battery charge and pod swap isn’t arbitrary. Battery voltage is what powers the sensor circuit. A sensor that looks broken is often just under-powered. Swapping the pod next costs almost nothing and eliminates the most statistically common failure mode in one move.
The blow-reset method works for a specific reason: it clears condensed moisture or light debris that’s falsely triggering the airflow sensor. It’s a low-risk test. But if liquid comes out when you blow, that’s not condensation, that’s a flooded sensor, and drying time matters more than any other step at that point.
The practical rule for end-of-life vs. repairable: if the device fires normally with a known-good pod and a full charge, it’s repairable. If it still won’t fire after both of those checks, or if it fires uncontrollably, the fault is internal and the device should be replaced, not repaired at home.
Replacement pods, coils, and accessories at VapeCiga
When cleaning and pod swaps aren’t enough, having the right replacement parts on hand matters. VapeCiga stocks replacement pods, coils, and compatible accessories for the most popular draw-activated pod systems, with fast domestic shipping across the U.S.
Before ordering, confirm your pod type, coil resistance, and connection style against your device manual. A mismatched coil resistance changes the draw feel and can stress the battery. VapeCiga’s product pages list compatibility details, and the support team can help match parts to your specific device. Browse replacement pods and pod systems or check coil compatibility and types before buying to avoid a mismatch. If a replacement part arrives and doesn’t resolve the issue, check the return and exchange options on your order confirmation.
Sources
Gather your device model, serial number, purchase proof, and photos of any damage before contacting support. Those four items speed up every warranty or RMA interaction.