


Sub-ohm vaping means running coils under 1.0Ω, usually between 0.1Ω and 0.8Ω, to push more current through the coil and generate bigger clouds and stronger flavor. It’s built for direct-to-lung inhaling, not the tighter mouth-to-lung draw of pod systems, and it demands more attention to wattage, battery limits, and e-liquid choice than standard vaping does. This guide covers the equipment, the tuning process, and the safety math, so you can build a sub-ohm setup that actually performs the way it should.
TL;DR:
- Sub-ohm coils below 0.2Ω require high current, so selecting batteries with a sufficient continuous discharge rating is essential for safety.
- Regulated mods maintain constant wattage regardless of battery voltage, reducing the risk of overheating and making setup more forgiving for beginners.
- Highest cloud and flavor quality are achieved with low resistance coils around 0.15Ω and fully open airflow, but this increases e-liquid and battery consumption.
- Proper coil priming, initial wattage setting, and gradual tuning prevent dry hits and burnt taste, significantly extending coil and tank lifespan.
- Rechargeable batteries must be authentic, matched, and stored safely, with attention to their CDR ratings to avoid overheating during high-current sub-ohm vaping.
Table of Contents
- What Sub-Ohm Vaping Actually Does to Your Vapor
- Is Sub-Ohm Vaping Worth the Trade-Offs?
- Building a Sub-Ohm Kit: Mods, Batteries, Tanks, and Coils
- Setting Up and Tuning Your First Sub-Ohm Coil
- Battery Safety: The Math That Prevents Accidents
- Dialing In DTL, RDL, and MTL Technique
- Fixing Burnt Hits, Leaks, and Weak Flavor Fast
- Who Wrote This Guide
- Temperature Control: Does It Belong in a Sub-Ohm Setup?
- Keeping Your Sub-Ohm Gear Running Longer
- What to Watch for With Vapor and Nicotine Intake
- Know the Rules Before You Build Your Setup
- The Honest Take on Sub-Ohm Vaping
- Ready to Build Your Sub-Ohm Setup
- Sources
- FAQ
What Sub-Ohm Vaping Actually Does to Your Vapor
Resistance is the brake pedal on current flow. Drop a coil below 1.0Ω and you let more current through, which the coil converts into heat faster. More heat means more e-liquid vaporized per puff, which is why sub-ohm setups produce noticeably denser clouds and a warmer draw than a standard 1.6Ω pod coil ever will.
Coil resistance in sub-ohm gear typically falls in the 0.1 to 0.8Ω range, and where a coil sits in that band changes what you get out of it:
- 0.6 to 0.8Ω coils run cooler, sip less battery power, and suit vapers who want flavor and moderate cloud without maxing out a mod’s wattage.
- 0.3 to 0.5Ω coils are the workhorse range for most sub-ohm tanks, balancing vapor density with reasonable coil life.
- 0.1 to 0.2Ω coils demand serious current and are typically reserved for rebuildable atomizers built by vapers who understand the amp draw involved.
Wattage is the other half of the equation. Ohm’s law ties resistance, current, and power together mathematically, and that relationship is why a regulated mod matters so much here. A regulated device locks your output at a set wattage regardless of how the battery’s voltage sags as it drains, which keeps the hit consistent puff after puff. A mechanical mod has no such regulation. It fires at whatever the battery happens to deliver at that charge level, which is a much less forgiving way to run current through a sub-ohm coil.
Is Sub-Ohm Vaping Worth the Trade-Offs?
Bigger clouds and warmer, richer flavor are the headline benefits, but they come at a real cost. Weighing both sides before you commit to a sub-ohm setup saves you from buying gear you end up not using.
What you gain:
- Denser vapor production that intensifies flavor, especially with dessert and fruit profiles built for high-VG liquid
- A warmer, fuller throat hit that many DTL vapers find more satisfying than a tight MTL draw
- Faster nicotine delivery per puff at lower nicotine concentrations
What it costs you:
- E-liquid consumption rises sharply compared to MTL vaping
- Batteries drain faster and need more frequent charging or swapping
- Coils wear out quicker under sustained high wattage, adding to your ongoing cost
- Bigger clouds are not welcome everywhere. Public and shared spaces often call for restraint
If you vape mostly for nicotine satisfaction without much interest in cloud size or flavor complexity, sub-ohm probably isn’t worth the added expense and battery management. It shines for vapers who genuinely want the DTL experience and don’t mind the upkeep.
Building a Sub-Ohm Kit: Mods, Batteries, Tanks, and Coils
A sub-ohm setup is only as good as its weakest component, and mismatched parts are where most beginners run into trouble. Start with the mod. A regulated box mod with a real wattage range, typically 40W to 220W depending on the model, gives you consistent output and built-in protections that a mechanical mod simply doesn’t have. Look for short-circuit protection, low-voltage cutoff, and a clear resistance readout on the screen.
Battery choice matters just as much as the mod itself. Sub-ohm mods typically run on 18650, 20700, or 21700 cells, and the number stamped on the wrapper tells you almost nothing about safety on its own. What matters is the continuous discharge rating (CDR), which is the maximum current a cell can sustain without overheating. Buy authentic cells from a known manufacturer, and if your mod takes two batteries, use a matched pair of the same brand, capacity, and age. A dual-battery kit like the Vaporesso GEN S Kit pairs a 220W regulated chip with a dual 18650 configuration, which is a reasonable template for what a complete high-wattage setup should look like.
On the tank side, you’re choosing between sub-ohm tanks built for simplicity and RDAs or RTAs built for tinkerers who want to build their own coils. For most vapers moving into DTL vaping, a sub-ohm tank is the easier entry point. The Smok T-Air Subtank is a solid example of the category, built around swappable coil heads rather than a single fixed coil, so you’re not locked into one resistance option as your preferences change.
Coil type is where mesh has genuinely changed the category. Traditional round-wire coils heat unevenly, creating hot spots that scorch wicking material faster. Mesh coils spread heat across a flat surface, which tends to mean faster ramp-up and longer usable life before the burnt taste sets in. GeekVape Mesh Coils for Zeus Sub-Ohm Tank 5pk are built for exactly this kind of even heating in a Zeus-compatible tank, and GeekVape MeshMellow Replacement Coils cover the Alpha Tank for vapers running that platform. Neither is interchangeable with the other’s tank body, so check compatibility before you order a five-pack.
E-liquid is the last piece, and it’s not one you can improvise around:
- Stick to high-VG blends, typically 70/30 or 80/20 VG to PG, since VG is what vaporizes into the dense clouds sub-ohm setups are built for.
- Keep nicotine strength in the 3mg to 6mg freebase range. Higher concentrations at sub-ohm wattages deliver a rough, often unpleasant throat hit.
- Skip nicotine salts entirely for DTL sub-ohm use. Salt formulas are built for the tighter draw and lower wattage of pod systems, not for the vapor volume a sub-ohm coil produces. If you’re curious what salt-based liquid actually looks like, something like VGOD SaltNic E-Liquid illustrates the format, but it belongs in an MTL pod, not your sub-ohm tank.
- A liquid like MBV E-Liquid 100ml, offered in 0/3/6mg strengths, shows the kind of VG-heavy, low-nicotine profile that’s built for this style of vaping.
Setting Up and Tuning Your First Sub-Ohm Coil
Getting a new coil running right the first time prevents almost every early problem sub-ohm vapers run into, from dry hits to a burnt-tasting draw that ruins a full tank of liquid.
- Inspect the coil before installing it. Check for bent mesh, loose wick strands hanging out of the airflow holes, or visible damage from shipping.
- Prime the coil. Drip a few drops of e-liquid directly onto the exposed wicking ports and let it soak in for 30 to 60 seconds before filling the tank.
- Fill the tank and let it sit for a full 10 to 15 minutes before firing. This gives the wick time to fully saturate, which is the single most skipped step that causes first-puff dry hits.
- Start at the bottom of the coil’s rated wattage range. Most sub-ohm coils list a range on the packaging, commonly somewhere between 40W and 80W. Fire at the lowest number first.
- Take short, low-power test puffs. Two or three seconds each, checking for any hint of a scorched or dry taste.
- Increase wattage in 5 to 10 watt steps, testing after each increase, until you land on the flavor and vapor density you want.
- Stop climbing the moment you taste anything dry or burnt. That’s your ceiling for that coil, not a wall to push through.
Before any of that, run a quick pre-flight check: confirm the battery is seated with correct polarity, glance at the resistance readout on the mod’s screen to confirm it matches the coil you installed, and set your airflow ring to fully open for sub-ohm use. A closed or half-closed airflow ring on a sub-ohm coil restricts the draw and raises vapor temperature fast.
Pro Tip: If you want to skip the trial-and-error entirely, run the wattage-to-resistance math first using a wattage tuning guide built around your exact coil range, then use the step-testing process above just to fine-tune within that window rather than searching blind.
Battery Safety: The Math That Prevents Accidents
Sub-ohm vaping pulls real current, and the batteries that power it are the one component where a mistake has consequences beyond a bad-tasting puff. The math isn’t complicated, but skipping it is how avoidable incidents happen.
Ohm’s law gives you the tool: current equals voltage divided by resistance (I = V/R). A fully charged battery outputs roughly 4.2 volts. Drop that into a 0.2Ω coil and you get 21 amps of draw, before accounting for any voltage sag as the battery discharges. That number needs to sit comfortably under your battery’s continuous discharge rating, not right up against it.
Battery ground rules worth memorizing:
- Confirm your cell’s CDR exceeds your calculated amp draw with real margin, not a razor-thin one.
- Never use a battery with a torn or peeling wrap. Exposed metal on a lithium cell is a genuine hazard.
- Don’t mix cells of different brands, capacities, or ages in a dual-battery mod. Mismatched batteries discharge unevenly, and that imbalance is where problems start.
- Charge only with a charger built for the cell type you’re using, and never leave batteries charging unattended overnight.
- Store spare batteries in a plastic case, away from loose keys or coins that can short the terminals in a pocket or bag.
Ohm’s law puts it simply: V = I × R and P = I² × R. A 0.2Ω coil run at 60W draws roughly 17.3 amps, a number every serious sub-ohm vaper should be able to work out before ever installing a coil.
If a device ever feels unusually hot in your hand, or the battery compartment gets warm during charging, stop using it immediately and let it cool in a safe, non-flammable location. That’s not overcaution. It’s the correct response every time.
Dialing In DTL, RDL, and MTL Technique
Sub-ohm gear isn’t locked into one inhale style, and matching your technique to your equipment changes the entire experience. Direct-to-lung (DTL) inhaling pulls vapor straight into the lungs in one motion and pairs naturally with sub-ohm coils in the 0.15Ω to 0.5Ω range at higher wattages. Restricted direct lung (RDL) tightens the airflow slightly, giving a middle-ground draw that still works with sub-ohm coils but feels less like breathing through an open pipe. Mouth-to-lung (MTL) pulls vapor into the mouth first, then to the lungs, and belongs with higher-resistance coils above 1.0Ω, not sub-ohm gear at all.
Airflow tuning is your main lever for comfort:
- Opening airflow fully drops vapor temperature and maximizes cloud size, ideal for pure DTL.
- Closing it partway raises resistance to the draw, warms the hit slightly, and can tame a coil that’s running a touch too hot for comfort.
- A fully closed ring on a sub-ohm coil almost always produces a harsh, overheated draw. It’s not designed for that setting.
Cloud chasers looking to maximize output should favor wide-bore drip tips, fully open airflow, and lower-VG-resistance coils in the 0.15Ω range, but common courtesy still applies. Save the biggest clouds for outdoor or well-ventilated spaces, not crowded indoor rooms.
Pro Tip: If you’re moving from MTL to a sub-ohm DTL setup, drop your nicotine strength before you drop your resistance. A 3mg to 6mg freebase liquid at sub-ohm wattage delivers noticeably more nicotine per puff than the same strength would through a tight MTL draw, simply because you’re inhaling far more vapor volume.
Fixing Burnt Hits, Leaks, and Weak Flavor Fast
Most sub-ohm complaints trace back to one of three fixable problems, and none of them require a new device.
- Dry or burnt hits: almost always a wicking problem. Re-prime the coil, let the tank sit longer after filling, and drop your wattage back to the bottom of the coil’s range before working back up.
- Leaking or flooding: check that the coil is fully seated and the tank’s seals are undamaged. Misaligned airflow rings are also a common culprit, so confirm the airflow holes on the coil line up with the tank’s airflow control.
- Spitting or popping sounds: usually means excess liquid is pooling on the coil. Lower your wattage a few watts, or try a mesh coil, which tends to distribute liquid more evenly than round wire.
Replace a coil the moment flavor turns muddy or a burnt edge creeps in even after re-priming, typically after one to three weeks of regular use depending on how often you vape. For a deeper breakdown of specific burnt-taste causes, a dedicated troubleshooting guide covers scenarios beyond the basics here.
Who Wrote This Guide
This guide is written by James for VapeCiga, drawing on the brand’s editorial coverage of sub-ohm setup and safety, including the Ohm’s Law Vaping breakdown, the Vape Wattage for Coils tuning guide, and a dedicated Mouth to Lung Guide covering the other side of the DTL versus MTL divide… The guide covers tanks, mesh coils, mods, and e-liquids relevant to sub-ohm vaping without referencing specific inventory or proprietary data.
Temperature Control: Does It Belong in a Sub-Ohm Setup?
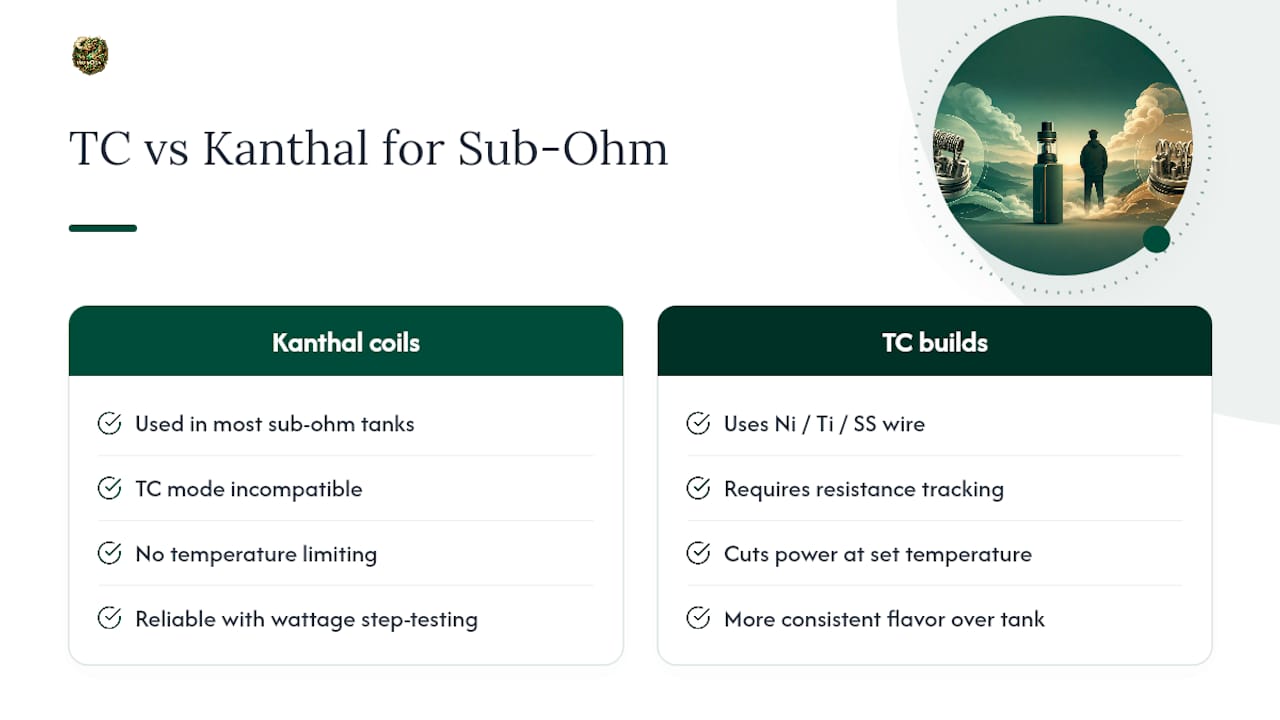
Temperature control (TC) mode caps coil temperature using resistance-tracking software, cutting power the instant the coil hits a set threshold, which theoretically prevents the dry hit before you ever taste it. It requires specific wire types, usually nickel, titanium, or stainless steel, and won’t work on the standard kanthal coils found in most sub-ohm tanks.
That’s the main friction point. Most sub-ohm coils, including the mesh coils covered earlier in this guide, are built from kanthal, so temperature control mode simply isn’t an option for them without switching to a TC-compatible build. For vapers running rebuildable atomizers with TC wire, the benefit is real: more consistent flavor across a full tank and less risk of accidentally scorching a coil while chasing bigger clouds. The drawback is added complexity. You need a mod that supports TC, wire the manufacturer explicitly rates for it, and an accurate resistance reading each time you rebuild. For most sub-ohm tank users running mesh or kanthal coils, standard wattage mode with careful step-testing delivers a similarly reliable result without the extra setup overhead.
Keeping Your Sub-Ohm Gear Running Longer
A little routine maintenance stretches both coil life and tank lifespan considerably, and most of it takes under five minutes.
Rinse the tank with warm water every time you swap coils or flavors, letting every part fully air-dry before reassembly. Trapped moisture inside a tank breeds residue that muddies flavor on the next fill. Wipe down the 510 connection on both the mod and tank regularly. E-liquid residue builds up there and can cause a poor connection or a firing button that feels unresponsive.
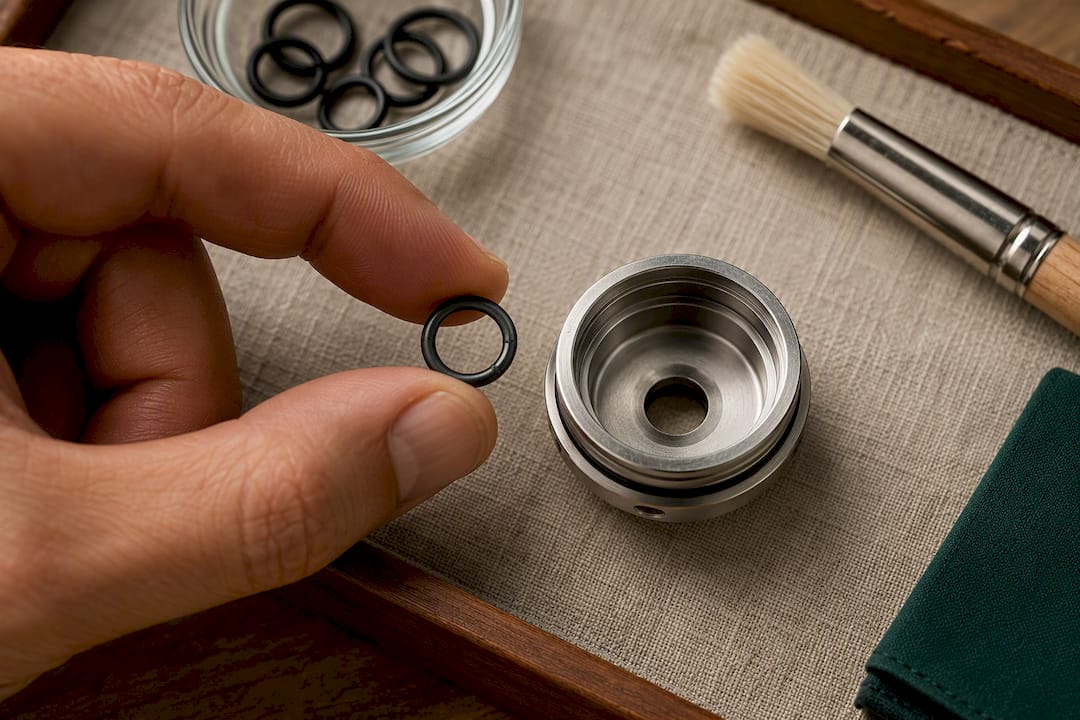
Check O-rings each time you disassemble the tank for cleaning. They dry out and crack over months of use, and a cracked O-ring is one of the more common causes of unexplained leaking. Keep spares on hand if your tank model sells them separately.
For the mod itself, keep the battery compartment free of e-liquid drips, and periodically clean the battery contacts with a dry cloth or cotton swab. Corrosion on contacts causes voltage drops that mimic a failing battery even when the cells themselves are fine.
Store spare coils in their original packaging until use, away from humidity, since pre-built coils can absorb ambient moisture that affects performance on first fire. A coil swapped and cared for on this kind of schedule will consistently outlast one left to run until it tastes actively bad.
What to Watch for With Vapor and Nicotine Intake
Sub-ohm setups produce significantly more vapor per puff than MTL devices, and that difference has real implications worth understanding rather than ignoring. More vapor volume generally means more total e-liquid, and therefore more nicotine, consumed over a vaping session even at lower nicotine concentrations. That’s precisely why this guide recommends staying in the 3mg to 6mg freebase range for sub-ohm use rather than the higher strengths common in MTL pod systems.
Denser cloud output in shared or enclosed spaces also means more secondhand vapor exposure for people nearby, which is a courtesy issue as much as a health one. Ventilated spaces and outdoor settings remain the more considerate choice for high-output sub-ohm sessions.
Coil material and wattage also factor in. Running a coil well past its rated range, or continuing to vape a coil that’s already producing a faintly burnt taste, increases the byproducts in the vapor you’re inhaling. That’s a core reason the step-testing tuning process earlier in this guide matters beyond just flavor. Staying within a coil’s designed wattage window isn’t just about avoiding a bad-tasting puff.
None of this is a reason to avoid sub-ohm vaping if you’re already an adult nicotine user making an informed choice. It’s a reason to run your setup within its intended parameters and stay attentive to how much liquid and nicotine you’re actually consuming per session, since it’s easy to underestimate with a high-output setup.
Know the Rules Before You Build Your Setup
Vaping regulation varies considerably by country and even by state or province within a country, and sub-ohm devices in particular sometimes draw extra scrutiny because of their higher liquid capacity and power output. Some jurisdictions cap tank size, restrict nicotine concentration, or require child-resistant packaging on e-liquid bottles, and those rules differ enough that a setup legal in one region may not be in another.
In the United States, vaping products are regulated federally by the FDA under its tobacco product authority, and purchase is restricted to adults 21 and older nationwide. Additional restrictions, including flavor limits or local sales rules, vary by state, so it’s worth checking your own state’s current requirements rather than assuming national rules cover everything. Traveling with sub-ohm gear across borders adds another layer, since some countries restrict e-liquid bottle sizes, nicotine concentration, or ban certain device types outright.
None of this is legal advice, and rules shift often enough that what’s accurate today can change within a year. If you’re uncertain whether your device, liquid strength, or tank capacity complies with rules in your area, check your relevant government health or customs authority’s own guidance rather than relying on forum consensus or a retailer’s general claims.
The Honest Take on Sub-Ohm Vaping
Most sub-ohm advice online obsesses over chasing the lowest possible resistance, as if 0.15Ω coils are inherently better than 0.5Ω ones. They’re not. The coil, the tank’s airflow design, the wattage you actually run, and the battery behind it all matter more than the number stamped on the coil head, and treating resistance as the single variable that defines a good setup is where a lot of beginners waste money on gear they don’t need.
The part conventional guides skip is the battery math. Plenty of vapers can tell you their favorite wattage but couldn’t calculate their own amp draw if asked. That gap is exactly where avoidable problems happen. Learn the simple Ohm’s law calculation once, check it against your battery’s CDR every time you build a new setup, and you’ve solved the one part of sub-ohm vaping that actually carries real risk.
If you’re prioritizing anything first, prioritize mesh coils and a properly matched battery over chasing the lowest resistance number you can find. Everything else is preference.
— James
Ready to Build Your Sub-Ohm Setup
If you’ve got the tuning process down and want gear that matches what this guide describes, VapeCiga carries the exact tank and coil types covered above, ready to ship. Unlike piecing together mismatched parts from a handful of different sellers and hoping compatibility works out, VapeCiga lists coil compatibility directly on each product page so you know a coil fits your tank before it ships.
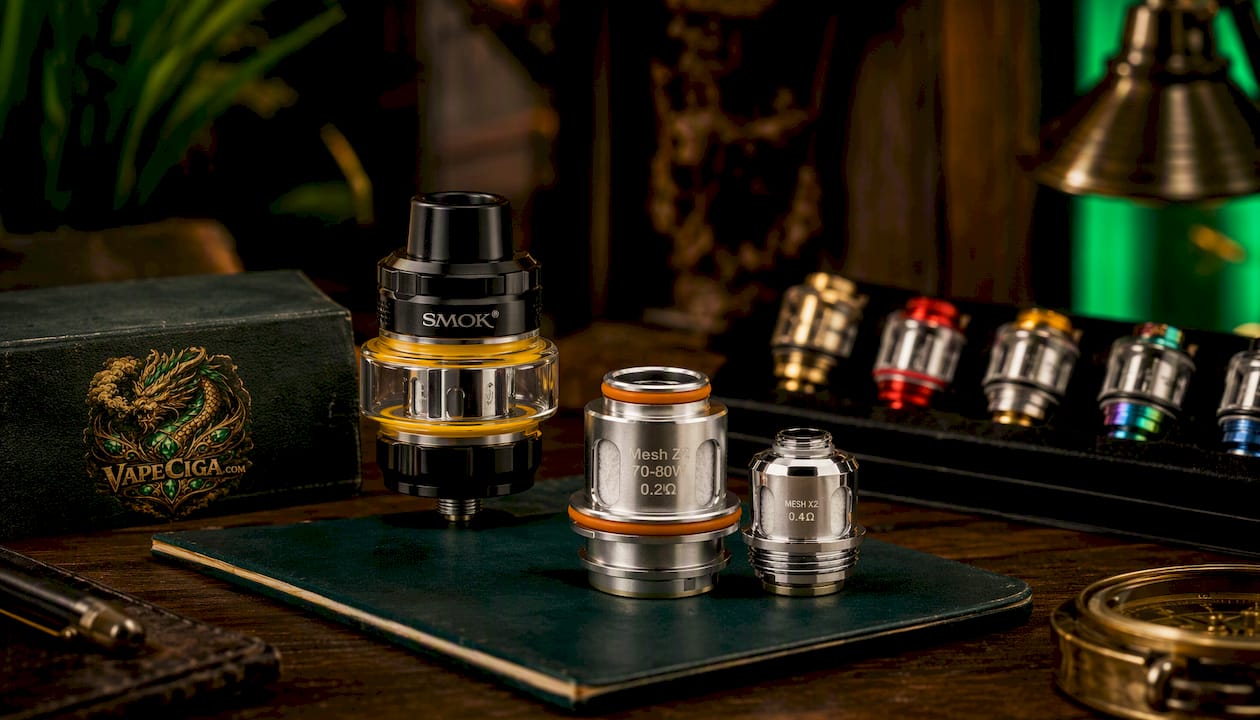
The Smok T-Air Subtank is a strong starting point if you want a sub-ohm tank with swappable coil heads rather than committing to one fixed resistance. If you’re already running a Zeus-style tank and want the even-heating benefits mesh offers, the GeekVape Mesh Coils for Zeus Sub-Ohm Tank 5pk give you a five-pack so you’re not reordering every couple of weeks. Running an Alpha Tank instead? The GeekVape MeshMellow Replacement Coils are built specifically for that platform’s coil bay, so check your tank model before ordering either mesh option.
Browse the full sub-ohm tank and coil selection at VapeCiga and get your next build shipped straight to your door.
Sources
FAQ
What kind of device is best for sub-ohm vaping?
A regulated box mod paired with a sub-ohm tank built for swappable coil heads, like the Smok T-Air Subtank, is the most practical starting point for most vapers moving into DTL setups.
Should I use a 0.8Ω or 1.2Ω coil for nicotine salt e-liquid?
Neither resistance is meant for sub-ohm vaping specifically, but between the two, a coil above 1.0Ω at lower wattage suits nic salts better since salts are formulated for the restricted, cooler draw of MTL pod systems, not high-output DTL coils.
What e-liquid works best for sub-ohm vaping?
High-VG blends in a 70/30 or 80/20 VG to PG ratio, with nicotine strength kept between 3mg and 6mg freebase, are the standard choice since VG vaporizes into the dense clouds sub-ohm setups are built to produce.
What wattage should I run on a 0.15Ω coil?
Most 0.15Ω sub-ohm coils operate comfortably starting around 60W, but always start at the lowest wattage the coil’s packaging lists and step upward in small increments until flavor and vapor density feel right.
Can I use temperature control mode with a sub-ohm tank?
Only if the coil is made from TC-compatible wire like nickel, titanium, or stainless steel. Most sub-ohm tank coils, including standard mesh coils, use kanthal wire and run in regular wattage mode instead.