


If your vape is not charging, the fastest path back to a working device is testing a known-good USB cable with a low-power 5W charger or a laptop USB port. Most charging failures trace back to one of four things, in this order: a bad cable, a blocked or damaged port, an incompatible charger, or a battery that’s simply worn out. Work through them in that sequence before you assume the device is dead for good.
Start here, right now, before reading further:
- Swap your current cable for a different one you know works on another device.
- Plug into a laptop USB port or a basic 5W phone charger, not a fast-charge brick.
- Check for a light on the device. No light at all often points to the cable or port, not the battery.
- Look at the port for lint, pocket dust, or dried e-liquid gunk.
- Give it 10 minutes on the alternate cable/charger before deciding it’s truly unresponsive.
Pro Tip: Try the laptop-USB-port test before anything else. It rules out a bad wall adapter and a bad cable in one step, since laptop ports rarely deliver too much current.
If none of that gets a light or a charge going within 10 to 15 minutes, keep reading. The next sections break down exactly what to check by device type, how to read blink patterns, and when a battery is done for good.
Key Takeaways
Most vape charging failures come down to a bad cable, a dirty port, or an overpowered charger, not a dead battery, and testing those three first solves the majority of cases within 20 minutes.
| Point | Details |
|---|---|
| Start with cable and charger | Swap to a known-good cable and a 5W/1A source before assuming the battery has failed. |
| Clean the port carefully | Use a dry toothpick or soft brush; never metal or water inside the charging port. |
| Read the blink pattern | Continuous rapid blinking with heat signals a safety issue, not a low battery. |
| Match the fix to device type | Non-rechargeable disposables get replaced; mods with removable cells can be tested externally. |
| Replace instant-full, quick-dead cells | That pattern means capacity loss, not a fixable fault. |
| Shop VapeCiga for replacements | VapeCiga carries replacement cables, external chargers, and higher-capacity mods for readers ready to upgrade past frequent charging fixes. |
Table of Contents
- Why Is Your Vape Not Charging? Start With These Checks
- How Do You Clean a Vape Charging Port Safely?
- Which Device Type Do You Have (And What Does That Change)?
- Is It the Battery or the Charging Hardware?
- When Should You Stop Charging and Walk Away?
- The One-Page Rescue Checklist
- Can You Revive a Completely Dead Vape Battery?
- Replacement Parts and Chargers Worth Keeping on Hand
- Sources
Why Is Your Vape Not Charging? Start With These Checks
Before touching the device itself, isolate the two cheapest and most common culprits: the cable and the power source. A cable that charges your phone fine can still fail on a vape because vape ports (especially micro-USB) are more sensitive to worn connectors than phone ports are.
Try this sequence:
- Test with a cable you’ve used successfully on another small device within the last week.
- Move from a wall adapter to a laptop’s USB-A port, or vice versa, to see if the issue is power-source specific.
- Try a different wall outlet entirely; a dead outlet or a tripped circuit is more common than people assume.
- If you own a multi-port USB hub, avoid it for this test. Hubs sometimes underpower connected devices.
A low-power 5W source is usually the safer bet for small vape batteries. Fast chargers built for phones can push more current than a pod or disposable’s protection circuit expects, which sometimes causes the device to refuse the charge entirely rather than charge quickly. Pod batteries in particular tend to charge best around 1A; a high-wattage brick can trip that safety threshold.
Indicator lights tell you a lot, once you know the vocabulary:
- No light at all when plugged in: almost always a cable, port, or power source problem, not a dead cell.
- Steady solid light: charging normally, or fully charged, depending on the model.
- Slow, regular pulsing: usually normal charging in progress.
- Rapid, continuous blinking: often a low-battery warning, a puff-limit cutoff, or in worse cases a short circuit. Blink counts and speed both matter — five to ten blinks commonly signals a low charge, three blinks often means you’ve hit a daily puff limiter, and continuous fast flashing deserves caution (more on that below).
Most disposables and pod systems with a USB-C port charge fully in 20 to 60 minutes, depending on battery capacity. If you’re at the 30 minute mark with zero light change on a fresh cable and charger, move to the cleaning step next.
Pro Tip: Keep one dedicated 5W charging brick just for vapes. It removes the guesswork of “was that cable/charger combo actually safe” every time something won’t charge.
How Do You Clean a Vape Charging Port Safely?
A clogged port is the single most common reason a vape refuses to charge, more common than an actual dead battery. Pocket lint mixes with dried e-liquid residue and forms a surprisingly effective insulator right where your charging contacts need a clean connection.
Here’s the safe way to clear it:
- Power down the device completely before touching the port, and unplug any cable.
- Use a dry wooden toothpick to gently loosen visible lint or debris inside the port opening. Never force it deeper than the pins.
- Try a dry, soft brush (an old clean makeup brush or a soft toothbrush works) to sweep out loosened debris.
- If residue remains, lightly dampen a cotton swab with isopropyl alcohol and gently clean the contacts, then let the port air dry completely, ideally for a few minutes before plugging back in.
- Inspect the 510 connector (on mods and refillable tanks) for a center pin that looks pushed in, corroded green, or coated in dried juice.
- Check magnetic pod contacts for the same buildup; a quick wipe with a dry cloth often restores full contact.
- Reconnect and test charging with your known-good cable before concluding the port itself is damaged.
The center pin on a 510 connector is often the quiet culprit. It can get pushed down flush with the threading after repeated tank changes, and a device that won’t fire or charge properly sometimes just needs that pin gently lifted back with a toothpick, not a full repair.
Never use metal tools, needles, or paperclips inside a charging port. Metal can bend or snap tiny internal contacts, and on micro-USB ports specifically, there’s a small plastic tab inside that holds the connector’s shape. It’s fragile, and forcing anything metal in there is the fastest way to turn a $20 fix into a dead port. Water and other liquids are off-limits too. Isopropyl alcohol evaporates cleanly; water does not, and it can corrode contacts from the inside.
Pro Tip: If you vape flavored e-liquids with high sugar content, clean your charging port monthly as routine maintenance. Sticky residue builds up faster than most people expect.
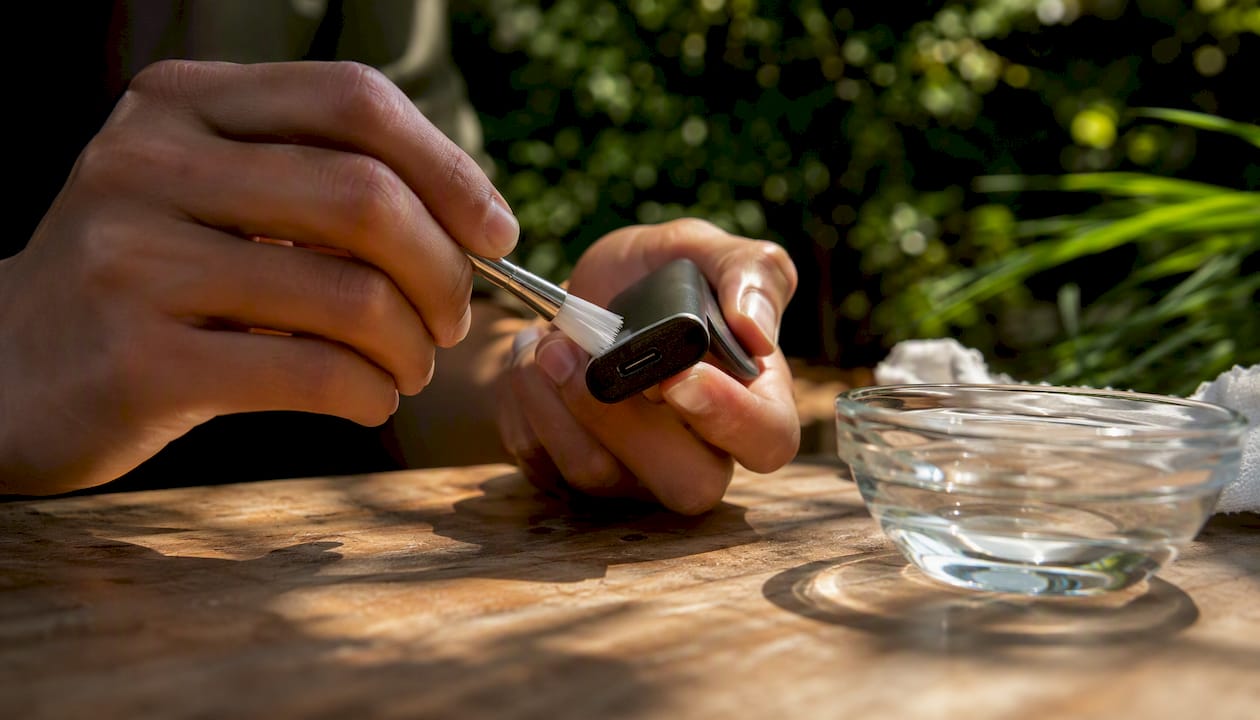
If the port looks physically bent, cracked, or the pin won’t seat no matter what you try, that’s a job for professional repair or, on a low-cost disposable, simple replacement. Micro-soldering a new port isn’t a weekend project for most people.
Which Device Type Do You Have (And What Does That Change)?
Charging troubleshooting splits sharply by device category, and knowing which one you’re holding saves a lot of wasted effort.
Rechargeable disposables have a USB-C or micro-USB port, usually on the bottom. If you see a port, this device is meant to be topped off and reused until the e-liquid runs dry, not discarded after one charge cycle. Blink patterns here matter most: a handful of blinks on plug-in typically confirms a low state of charge, while a light that never appears usually means the port, cable, or charger is at fault rather than the cell itself.
Non-rechargeable disposables have no port at all. If yours won’t “charge” and there’s nothing to plug into, that’s not a malfunction. It’s designed behavior, and the device is meant to be recycled once the battery or e-liquid is spent.
Pod systems and vape pens add a wrinkle: sometimes the issue isn’t charging at all, it’s the pod. Reseat the pod firmly, check that the airflow sensor isn’t blocked by residue, and confirm the coil inside the pod hasn’t burned out. A pod system that charges fine but produces no vapor points to the pod or coil, not the battery, and that’s a different fix entirely.
Mods with removable batteries give you the most diagnostic freedom. Pull the cell, inspect it for swelling or damage, and test it in an external charger designed for 18650 or similar lithium cells. An external charger paired with a basic multimeter lets you isolate a battery fault from a charging-circuit fault far more precisely than testing in-device.
| Device type | Has a port? | Most likely fix |
|---|---|---|
| Rechargeable disposable | Yes (USB-C/micro-USB) | Clean port, swap cable/charger, check blink pattern |
| Non-rechargeable disposable | No | Replace and recycle; not a fault |
| Pod system or pen | Yes | Reseat pod, check coil/airflow, then charging basics |
| Mod with removable battery | Yes, plus external option | Test cell externally with a dedicated battery charger |
Is It the Battery or the Charging Hardware?
Lithium-ion cells don’t fail overnight, they wear down gradually with every charge cycle, and heat accelerates that decline. Small disposables typically run 200 to 550 mAh cells, while pod systems and mods often carry 1000 mAh or more, which is part of why bigger devices need less frequent charging in the first place.
The classic sign of a dying cell is speed, not slowness: if the device shows “full” almost instantly after plugging in but dies again within a couple of minutes of use, that’s a capacity-loss pattern, not a charging problem. No amount of cable-swapping fixes that. The cell has lost its ability to hold a useful charge and needs replacing.
Protection circuits complicate the picture further. Most vape batteries include a small circuit that refuses to accept current if voltage or amperage looks wrong, which is a safety feature, not a defect. If a fast charger or an unusually powerful USB brick trips that protection, the device may show no charging behavior at all, even though the battery itself is healthy. Stepping down to a basic 5W source often resolves this instantly.
If you own a multimeter, a basic voltage check on a removable cell tells you a lot:
- A healthy lithium-ion cell reads roughly 3.7V to 4.2V when charged.
- A reading well under 3.0V, especially near 2.5V or lower, often indicates a cell that’s been deeply drained past its safe threshold.
- A reading of 0V usually means the cell’s internal protection has permanently shut it down, or the cell is dead.
Typical charge times scale with capacity and charger amperage:
If a cell reads 0V and shows no response after 30 minutes on a gentle charger, stop trying. Repeated attempts to force a charge into a cell that’s flatlined risk overheating rather than revival.
When Should You Stop Charging and Walk Away?
Some symptoms mean stop immediately, not troubleshoot further. A battery that feels warm to the touch while charging, one that looks visibly swollen or puffy, or a device that blinks continuously and rapidly without stopping are all signs of a genuine safety issue, not a routine fix.
Continuous rapid blinking during charging, especially combined with heat, often signals a short circuit or an auto-fire condition rather than a simple low-battery warning. That distinction is the difference between “charge it later” and “unplug it now.”
If you see any of these signs, take these steps immediately:
- Unplug the device from power right away.
- Set it on a non-flammable surface (a tile floor, a metal tray, concrete) away from anything that burns.
- Do not attempt to puncture, cut open, or disassemble a swollen battery under any circumstance.
- Do not continue plugging it in “just to see” if it recovers.
- Let it sit somewhere safe and monitored for a while before handling it further.
Damaged lithium-ion batteries need proper disposal, never a regular trash bin. Most communities have battery recycling drop-off points at hardware stores or municipal recycling centers, and many vape retailers accept damaged devices for safe disposal too. If a device under warranty shows these symptoms, contact the retailer rather than attempting any repair yourself. Swollen or overheating batteries are one of the clearest “stop DIY, seek help” situations in vaping.
The One-Page Rescue Checklist
Run through this in order. Each step takes just a few minutes, and you should know within about 20 minutes total whether the device is salvageable.
- Swap the cable (1 minute): Use a different USB cable you know works elsewhere.
- Try a laptop USB port (2 minutes): This rules out a bad wall adapter without needing a second brick.
- Inspect and clean the port (5 minutes): Toothpick, dry brush, or an alcohol-dampened swab if needed, then let it dry.
- Switch to a known 5W/1A charger (2 minutes plus charging time): Avoid fast-charge bricks for this test.
- Test a second cable/port combination (2 minutes): Confirms whether the first fix actually worked or was coincidence.
- Check the indicator light pattern (immediate): No light means power/connection issue; blinking means read the pattern against what’s covered above.
- Give a deeply drained battery extra time (10 to 15 minutes): Some cells need a few minutes of trickle charging before the indicator light even appears.
If you’ve worked through all seven steps and there’s still zero response, that’s your signal to move to device-specific checks (removable battery testing, pod inspection) or, for a non-rechargeable disposable, simply replace it.
Can You Revive a Completely Dead Vape Battery?
Sometimes, yes, but only within limits. A cell that’s been sitting drained for weeks can sometimes be coaxed back with patient, low-power charging. Plug it into a gentle 5W source and let it sit for 30 to 60 minutes without touching it, checking periodically for any light or warmth response. The stepwise swap-test approach, cable then power source then port, applies here too before you conclude the cell itself is gone.
What you should never do, under any circumstance:
- Never short the battery terminals together to try to “jump” it. This is a fire risk, not a fix.
- Never attempt spot-welding or opening the battery casing to access cells directly. That’s specialized work with real injury risk.
- Never use a high-voltage or high-amperage charger hoping it’ll “force” a stubborn cell to accept charge faster. It usually trips the protection circuit or damages the cell further.
- Never leave a revive attempt unattended for hours. Check on it periodically.
For mods with removable 18650 or similar cells, a dedicated external battery charger designed for lithium-ion cells is the safer, more controlled option than trying to revive the cell in-device. If a cell shows physical damage, has been previously charged with an incompatible charger, or simply won’t respond after a genuine revive attempt, professional battery service or straightforward replacement beats continued DIY effort.
Pro Tip: Set a timer when attempting a revive charge. Walking away and forgetting about a device on a gentle trickle charge for hours defeats the purpose of “gentle” and “monitored.”
A practical note from the field
Most of the “my vape won’t charge” messages I see in practice turn out to be a $3 cable problem dressed up as a dead device. People assume the worst, a fried battery, a broken circuit board, when nine times out of ten it’s lint in the port or a fast charger that’s simply too aggressive for a small cell’s protection circuit.
If you’re chasing a “lights up but no smoke” symptom instead of a true charging failure, that’s a separate issue with its own fix path, usually the coil or pod, not the battery. And if your device has developed a persistent burnt taste alongside charging quirks, that points to coil wear rather than the power system.
The safety-first sequence in this article isn’t overcautious for the sake of it. Swollen batteries and continuous-blink short circuits are the two situations where “just try one more thing” genuinely turns a $20 loss into a real hazard. When in doubt, replace rather than repair.
Replacement Parts and Chargers Worth Keeping on Hand
Once you’ve worked through the checklist, a few reader end up needing an actual replacement rather than a fix, and that’s normal for devices that have been through a lot of charge cycles. VapeCiga stocks the parts that solve most of what this article covers:

- Replacement USB-C cables and basic 5W/1A chargers for readers whose original cable turned out to be the culprit.
- External battery chargers for mod users with removable 18650 or similar cells, letting you charge and test a cell outside the device.
- Reusable battery options like the Spree Bar reusable battery, a solid step up for anyone tired of tossing a non-rechargeable disposable every time the battery dies before the e-liquid does.
- Higher-capacity mods with removable cells, such as the GeekVape T200 (Aegis Touch) Mod, which gives you external charging flexibility instead of being locked to a single built-in port.
- Mid-range mods built for charge stability, like the Vaporesso GTX One Vape Mod 2000mAh 40W, a practical option if you’re upgrading from a small disposable that needed constant recharging.
If your current device’s port is physically worn out or the battery shows the “charges full instantly, dies fast” pattern covered earlier, replacing it usually costs less than a repair attempt and comes without the guesswork. Browse VapeCiga’s mod and battery selection to find a device that matches how often you actually want to be near a charger, and check the product page for warranty and return details before you order.
Sources
- Why Is My Disposable Vape Blinking? Causes & Fixes — Vaping360
- How to Fix a Vape That Won’t Charge — The Vapers Guide
- Pod Vape Not Charging? Causes and How to Fix It — VapingVibe
- Why Is My Disposable Vape Blinking? (And How to Fix It) — VapeObservation
- How to fix a blinking disposable vape — Innokin